How to Install Brushes for Photoshop 7+

If you have downloaded some of the free Photoshop brushes featured in this website but don’t know what to do with these files to get them working with Photoshop, here’s a quick Photoshop tutorial to get you going.
Brushes created in Photoshop 7 or later will not work in earlier versions of Photoshop but should work in Photoshop 7 and later.
First step: Put the brushes (.abr) files to any folder. (Not necessarily in Program Files\Adobe\Adobe Photoshop X\Presets\Brushes) In my case, I save my brushes in a folder named “brushes” under Photoshop. Of course you can name your folder “whatever” or any other name and put it under “My Documents” or in your “Desktop”… your choice.
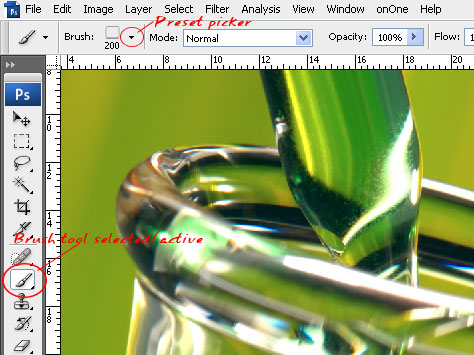
Second Step: In Photoshop, select the brush tool on your tool palette, go to option palette and click on to open the brush preset picker.

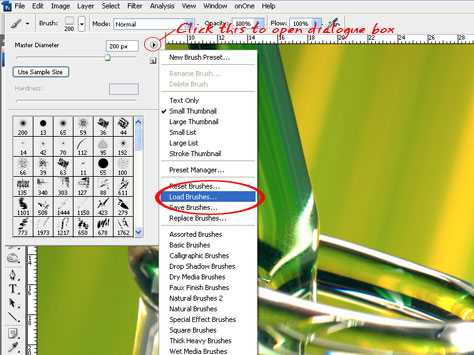
Third Step: From the Brushes Palette in Photoshop, click the small arrow in the upper right corner of the palette, and choose load brushes/replace brushes. The “load brushes” command will add the selected brushes to your current brush library while “replace brushes” will remove the exisiting brushes in your library and replace them with the brushes that you are going to load.

Fourth Step: Locate the directory where you have stored the brushes (.abr files) and select the file that you want and click “load”. The brushes will be added to the current brushes (if you selected “load”) or replace the brushes currently in your library (if you selected “replace”).
Enjoy using the brushes!


